
Introduction
How crazy… I never thought there would be enough interest for me to write a blog entry to tell people what camera gear I‘ve been lugging around in my backpack for the last two years. It’s what the people of Instagram wanted and once they cast a vote then there’s no going back.
My whole photography journey so far has been one big blur. I still remember solo tripping to Rodney’s Pillar, my local hill walk with a little point and shoot Canon Powershot to basically copy a photograph that I’d seen one of my favourite fitness influencers post on Instagram. Since that day, I must have driven the A5 to Snowdonia about 10,000 times and eaten the same amount of Moel Siabod full English breakfasts just up the road from Snowdon & the Ogwen Valley here in Wales.
Anyway, enough reminiscing, that’s one for another blog entry. I think it seems fitting to start by introducing you all to the camera body that I picked & why I chose this nearly two years ago to start my photography journey.
The Body
Canon 800D

Canon 800D - The perfect camera body for a beginner photographer.
The Canon 800D, one piece of kit I don’t think I’ll ever be able to part with. This camera would be a dream for any photographer that’s starting out. It has some fantastic features, especially when you’re shooting in Manual mode, as it will display, on the LCD screen, some simplified graphics that show you what type of effect you may get on your photograph, with the settings that you have picked. So, if you want to level up your game up early on, I’d recommend playing around with the different settings whilst keeping an eye on how this changes the look of your images. I linked one in-depth article that explains this in more detail above, there is also another here just in case you need another source. Once you’re up to speed, you can easily disable this feature in the simple-to-navigate settings menu.
Another great feature on this camera and one that also helped to convince me to buy this, was the fully articulating screen, so this is a screen that pops out and rotates 180 degrees as well as twisting fully up and down - great for when you want to get really low to the ground, taking videos and those family beach selfies at sunset.
Though the megapixel count isn’t the be-all and end-all in photography, it’s great to know that this camera came packed with 24.2 megapixels. This ended up working out perfectly for me as I have printed a number of my pictures so far and this ensures that they come out of the printer with plenty of detail, even up to a 24’’ print and easily beyond. There’s a great article that explains megapixels in further detail linked above.
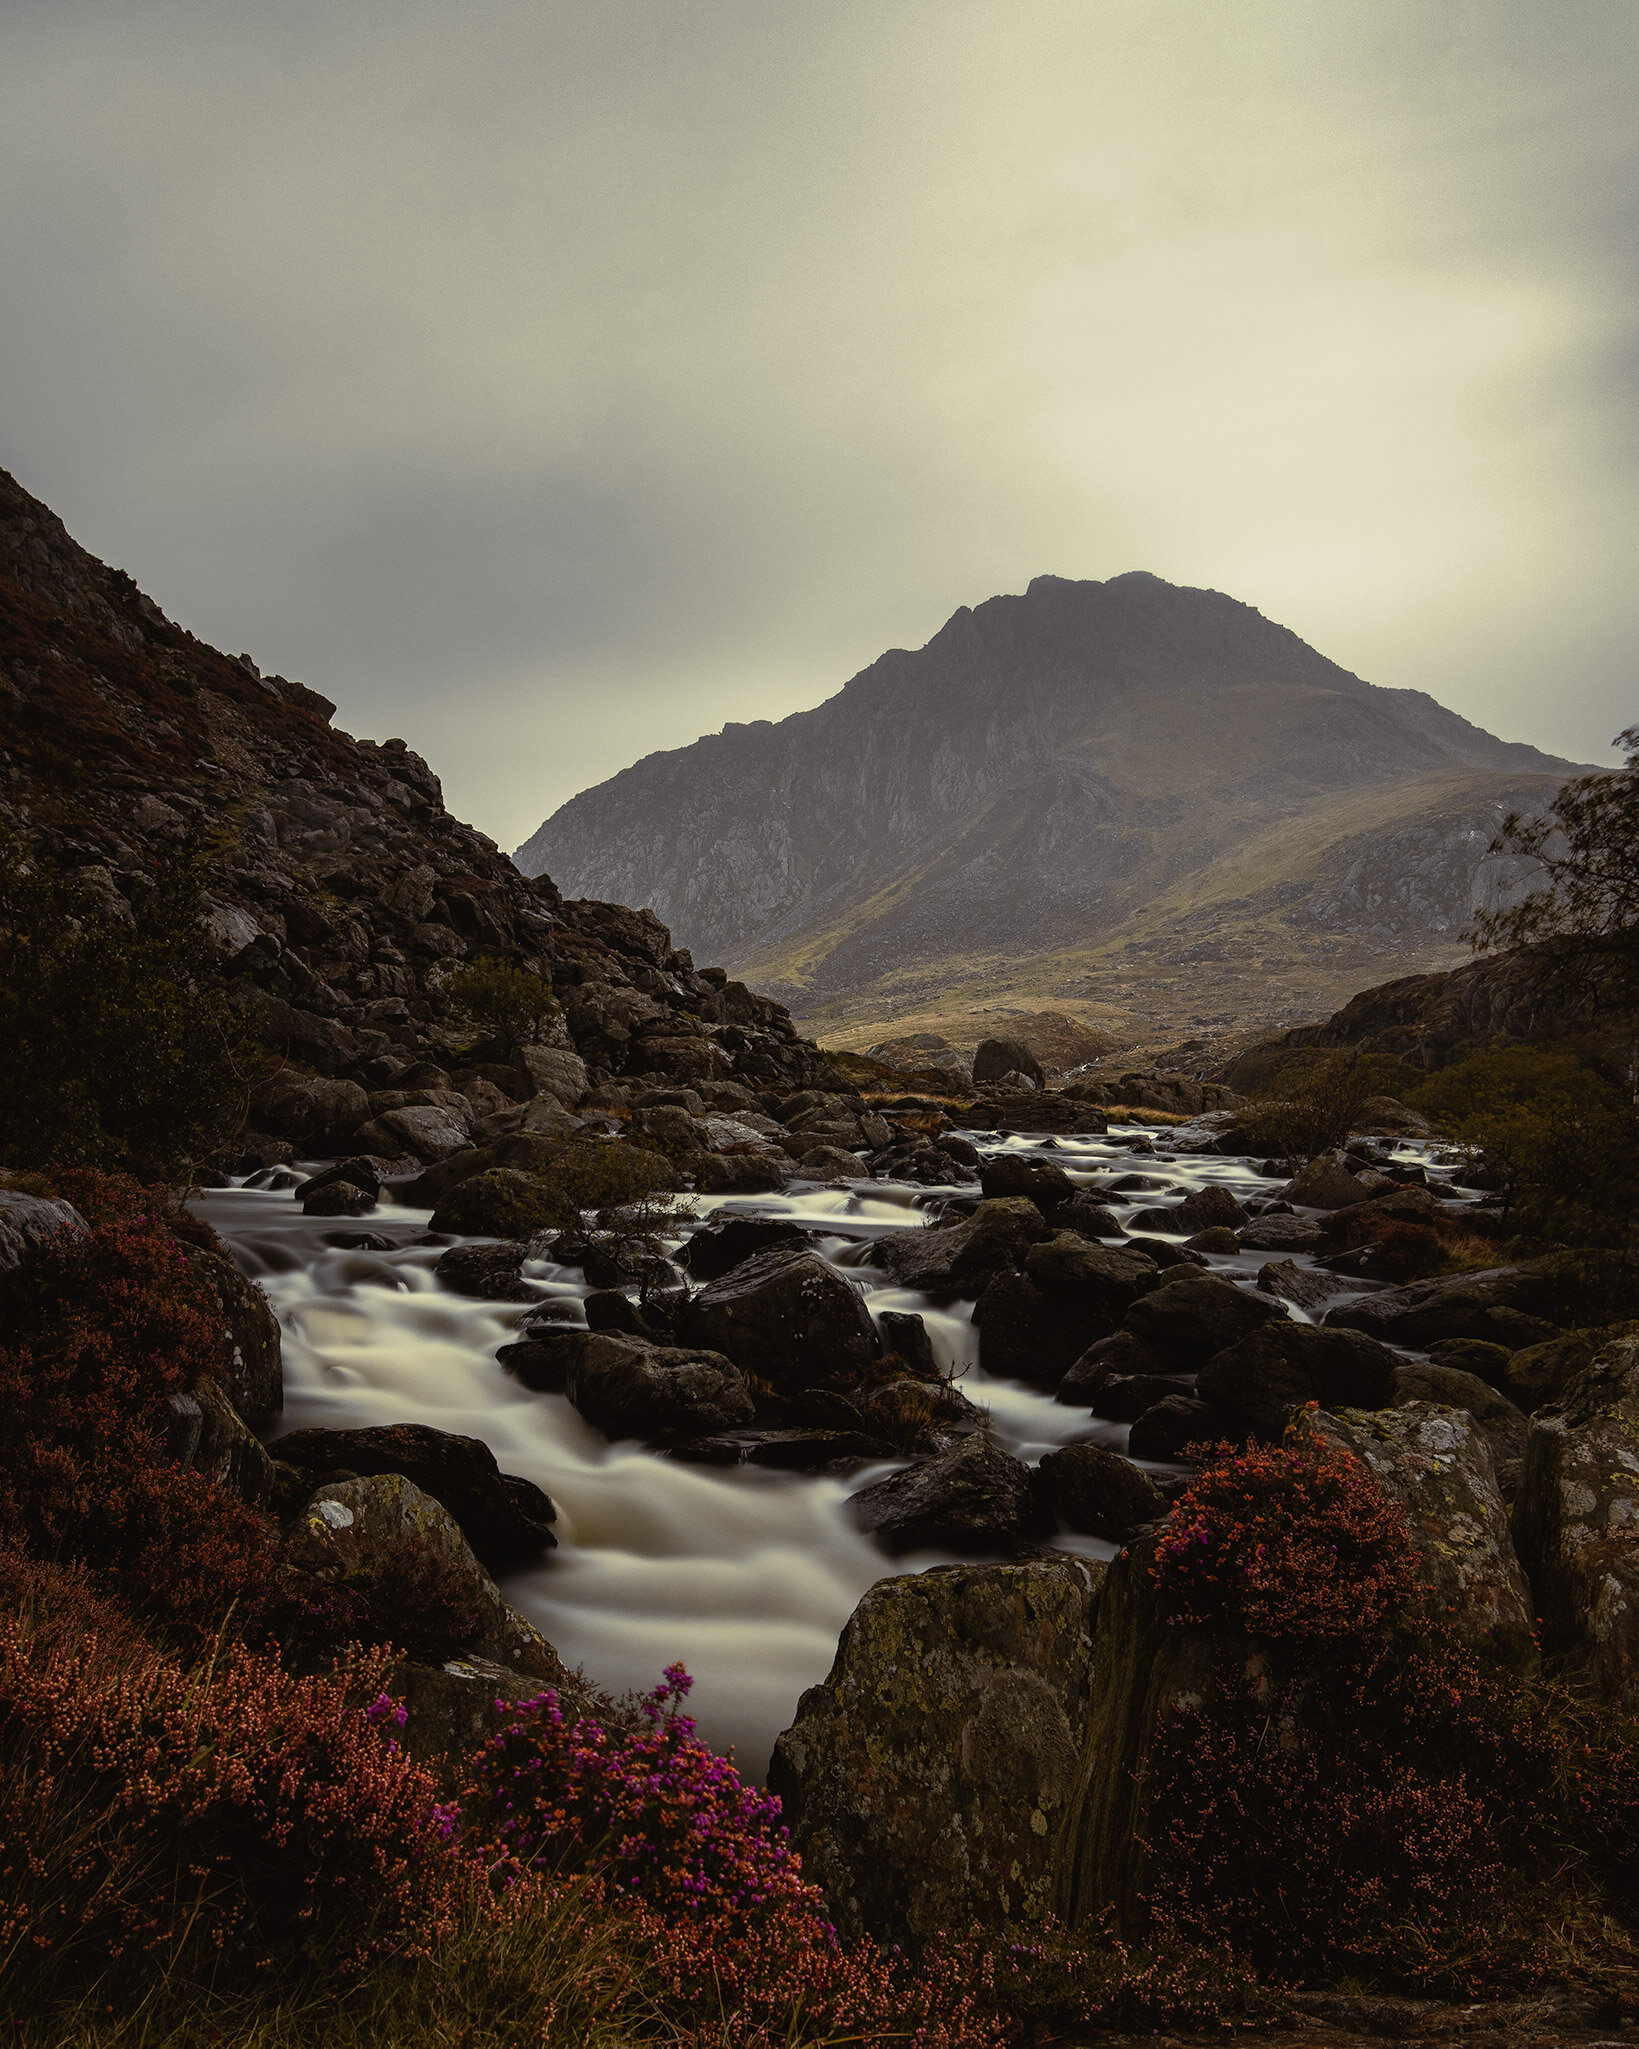
Below, I’ve shared some of my favourite photographs that I’ve managed to gather over the last few years of shooting with the Canon 800D. All of these had Canon’s 16-35mm f/4 lens attached which you can read about down below. Click each photograph to expand for a better look.


The Lenses
Canon 16-35mm f/4
Hands down, my favourite & without a doubt, my most used lens. I think I have about 16,000 photographs spanning two and a half years across my different hard drives, I’d guess that around 7-8,000 of them were taken with this. All in the space of about 8 months.
The cheapest and, probably, most popular option for the Canon 800D will include an 18-55mm kit lens (at about £750) which is a great, versatile lens to start you off but, if you’re serious about taking landscape photos and a whole host of other types of pictures, then you NEED to invest in this lens ASAP! It will set you back around £650, I picked one up from Wex Photo Video - scroll down the linked page and navigate to the ‘Used’ tab. I generally wont buy anything used that has less than a rating of 9 but you can find cheaper options with lower ratings if you don’t mind the odd scratch or scuff.
This lens comes with a built in Image Stabiliser, so you can easily use this without the need for a tripod in most instances. Having that feature is a godsend as I find that some of my favourite photography conditions are after the sun goes down or on cloudier days where there tends to be less light to work with in my photos. With the stabiliser enabled (which it will be 90% of the time if you’re like me) I’m able to get down to the slower shutter speeds, while still getting pin sharp pictures - sometimes I’m down to 1/10 of a second handheld and this lens has no problems compensating for any hand movements which are inevitable for most photographers.
Please note: if you’re looking to get into astrophotography (taking photos of the night sky) then this probably isn’t the lens for you. You’re probably going to want to look at something that lets a little more light into the lens. Something like this will be better suited for those kind of photographs.
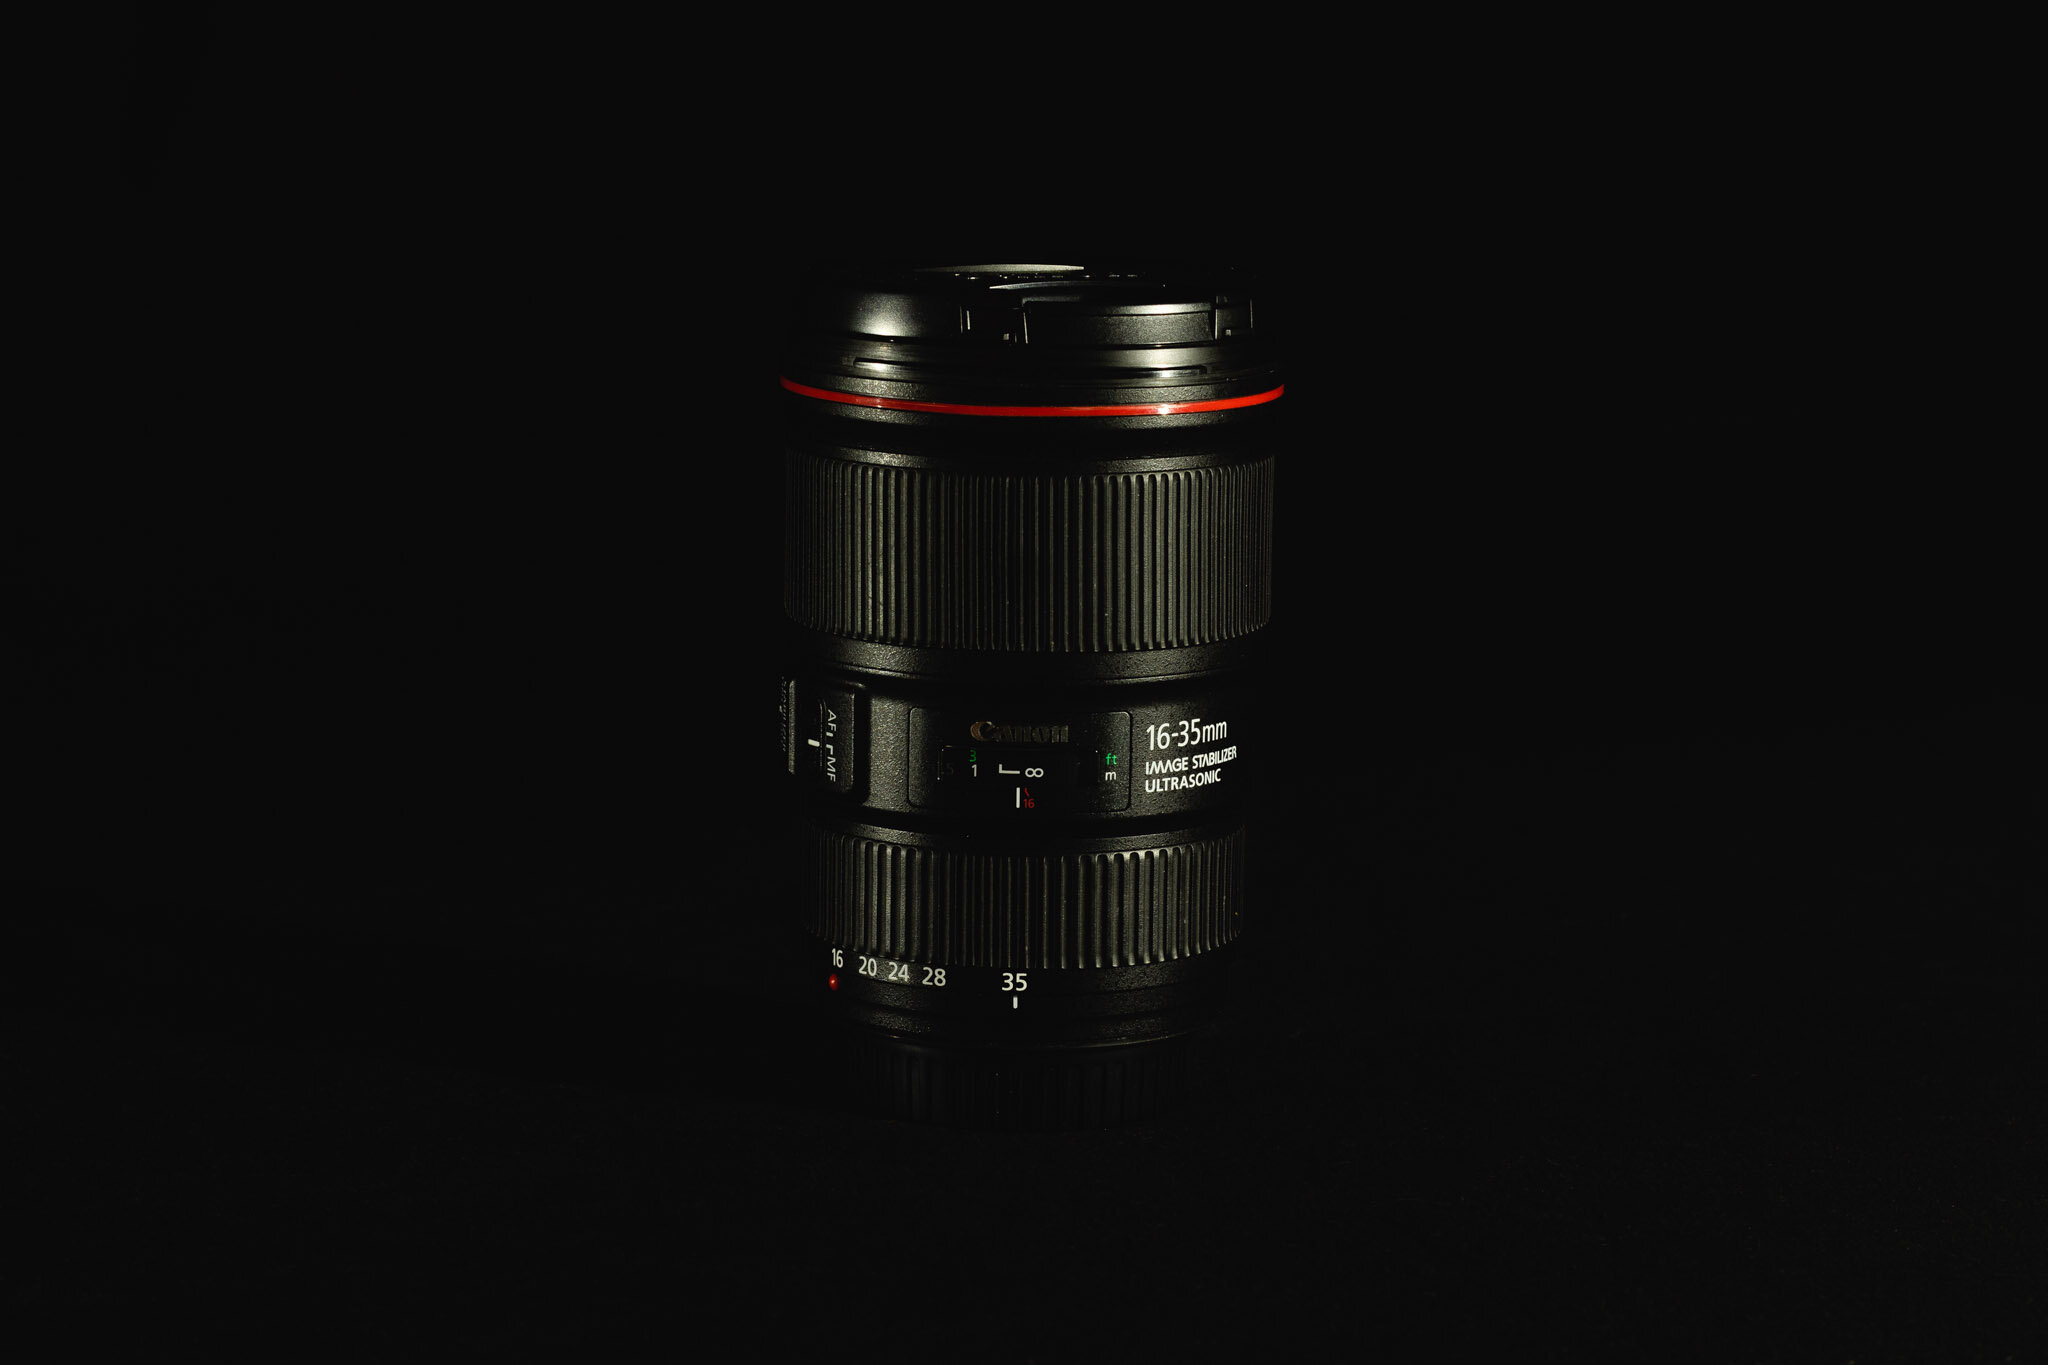
Canon 16-35mm f/4 wide angle lens, perfect for landscape photographers.
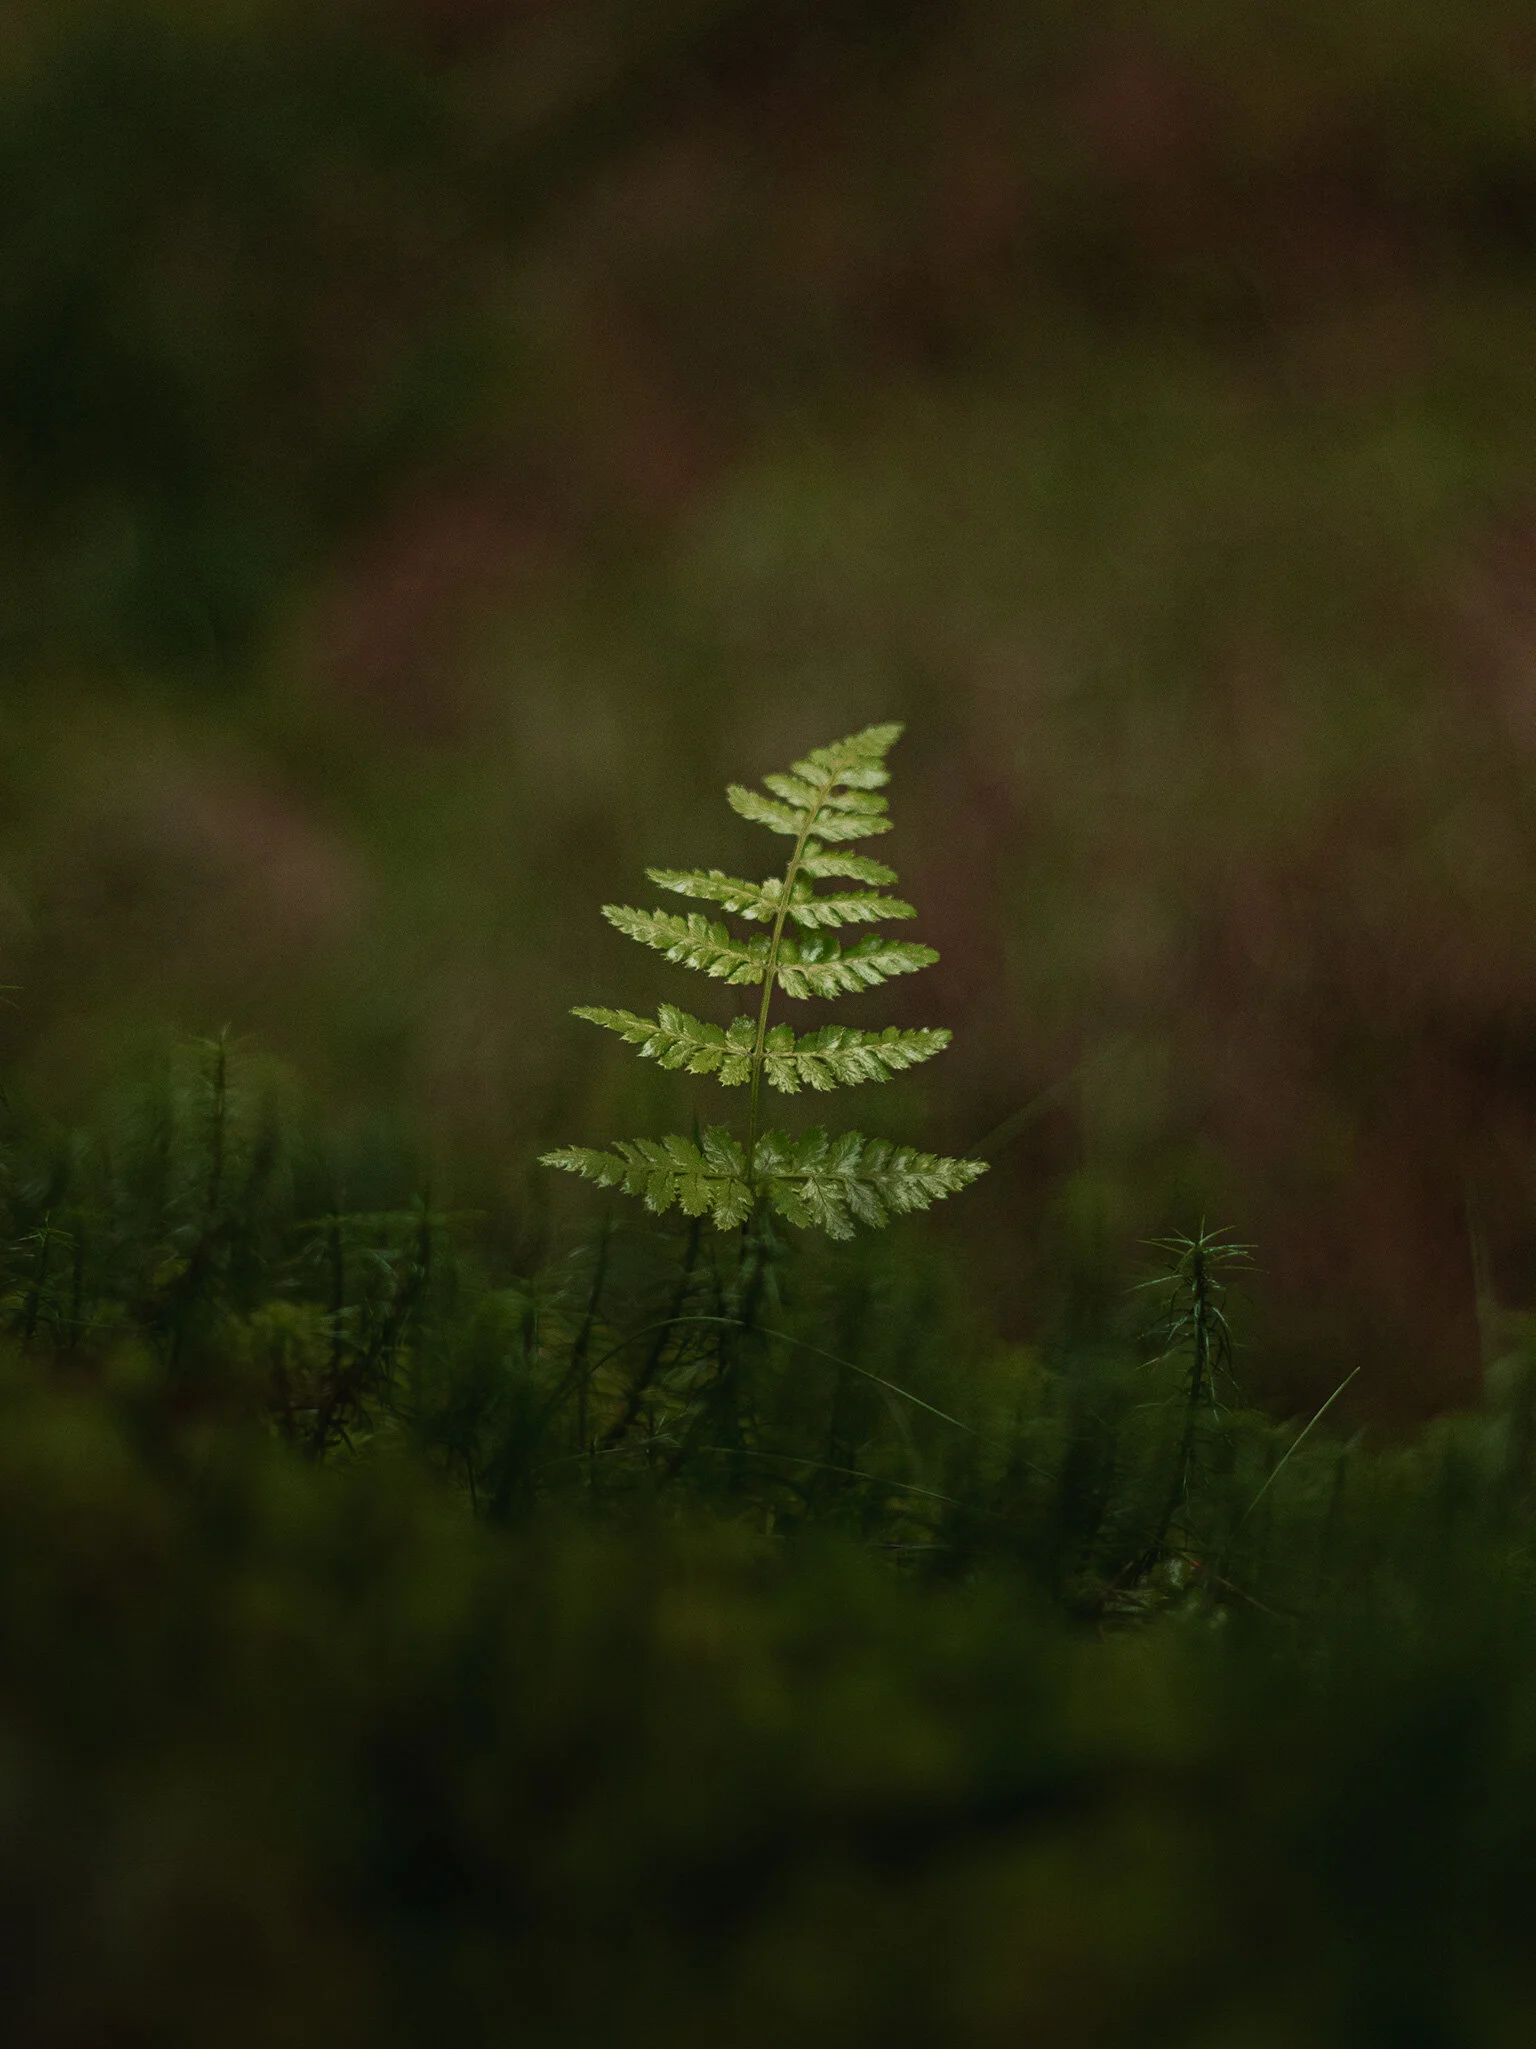
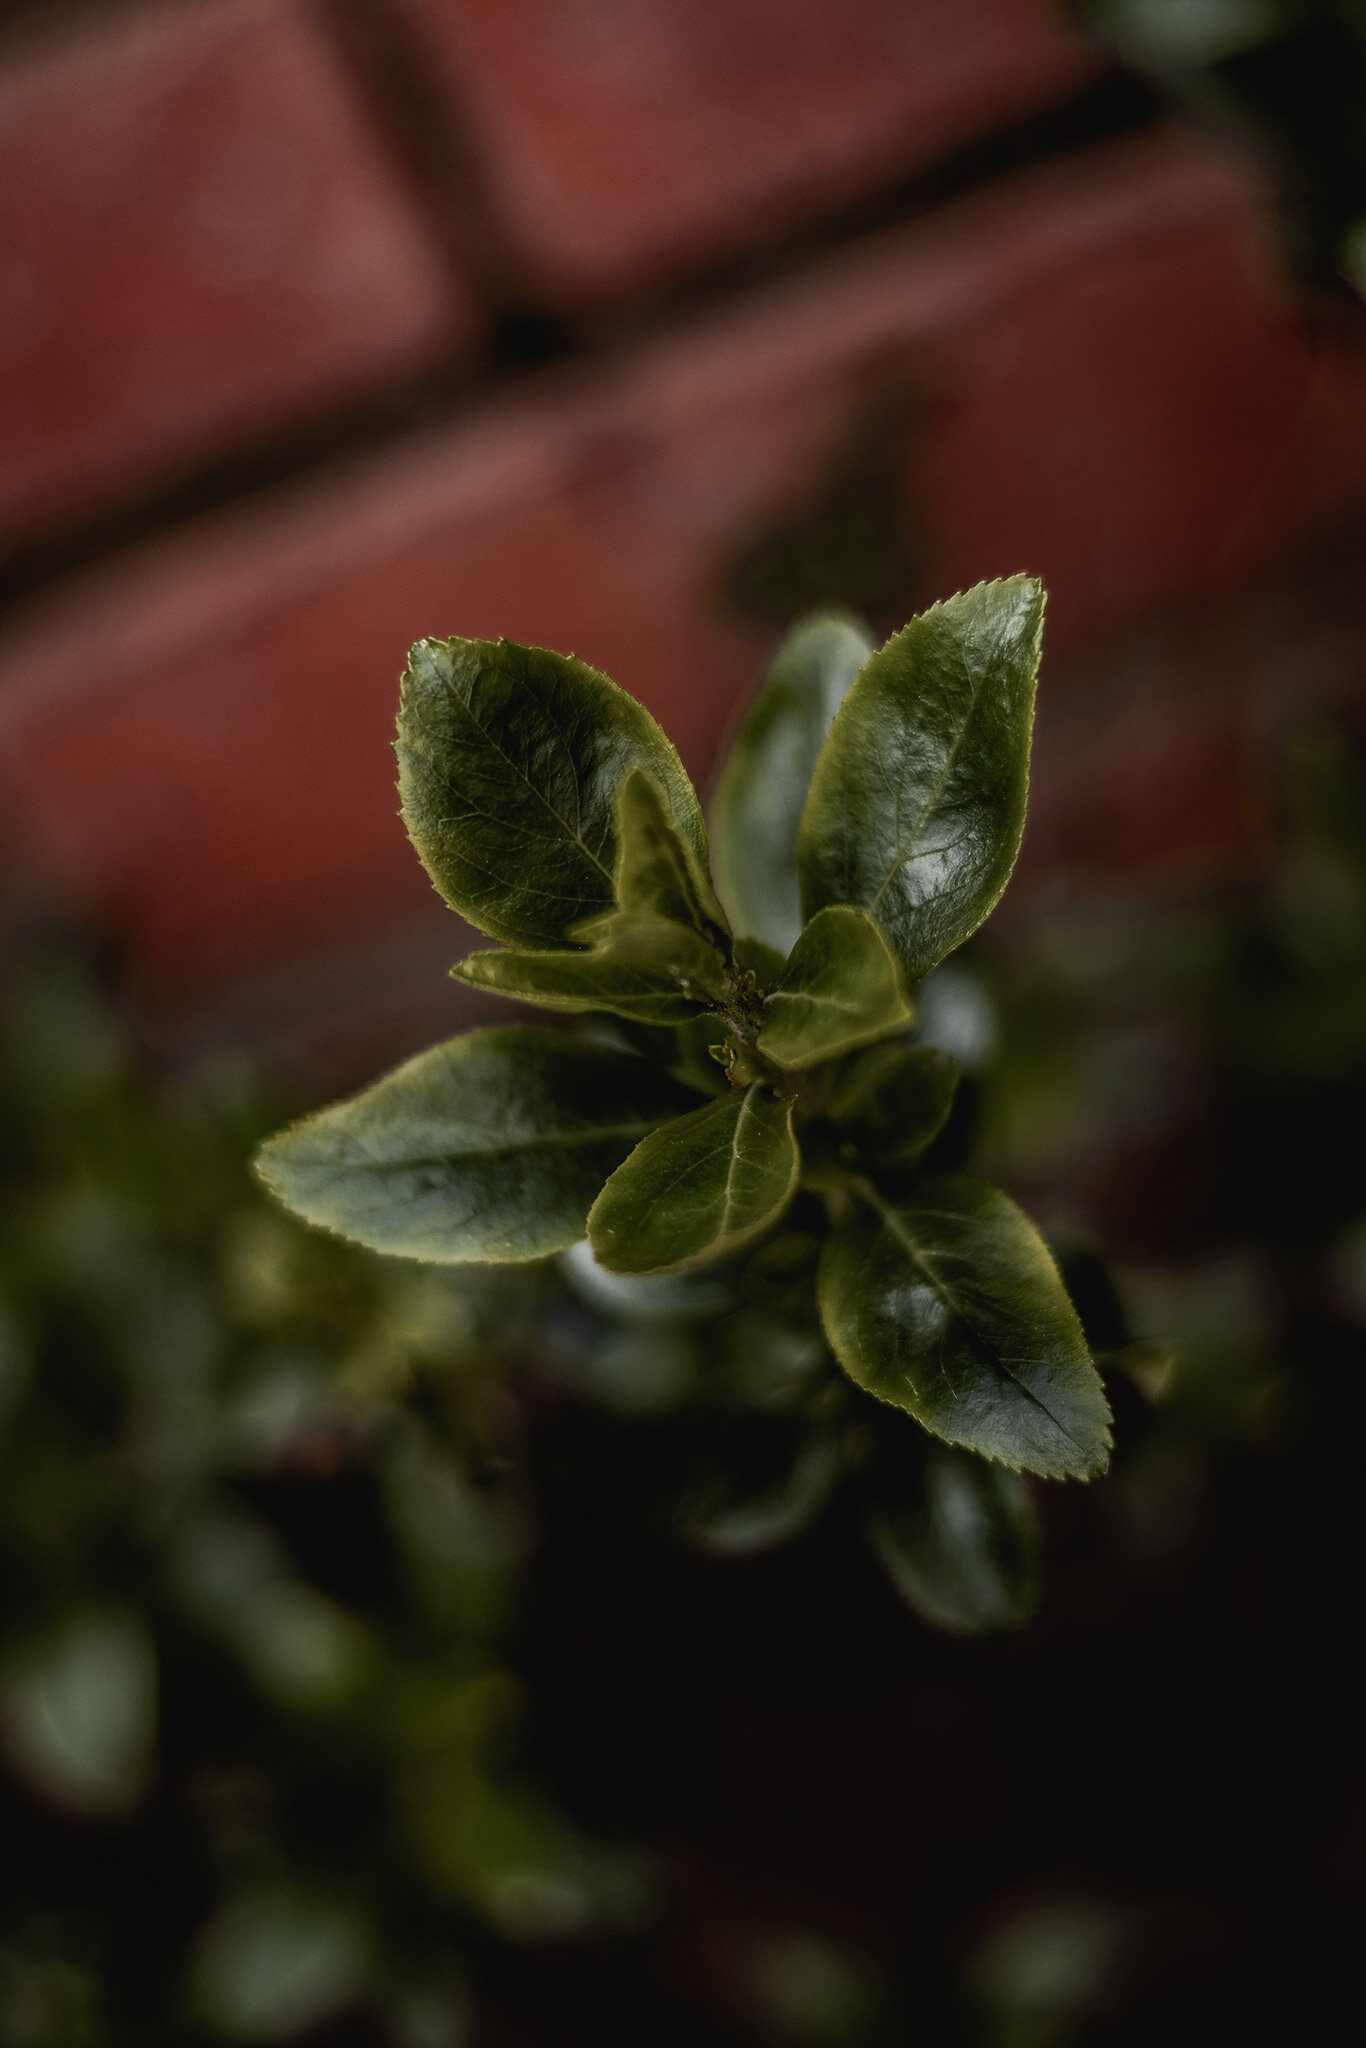
Canon 50mm f/1.8
While the above lens is probably going to put a hefty dent in your bank account, this little bad boy lens I’m about to talk to you about will cost you about 80 loaves of bread, 40 lattes from a coffee shop or 1 instantly regrettable night out. £109 from Amazon and I can guarantee you that this is some of the best money that I’ve ever spent. I took this to Iceland on my first photography trip and pretty much every photo I came home with, was shot using this lens. I’ll display some of the pictures from Iceland down below.


It’s not called the nifty fifty for no reason, this lens only weighs 160g. Pair this with the Canon 800D camera body including the battery and card and you have a full set up that weighs just 692g - it was perfect for carrying around all day on hikes in the mountains and adventuring to the epic waterfalls that are a trademark of Iceland.

Canon 50mm f/1.8 lens aka the nifty fifty.
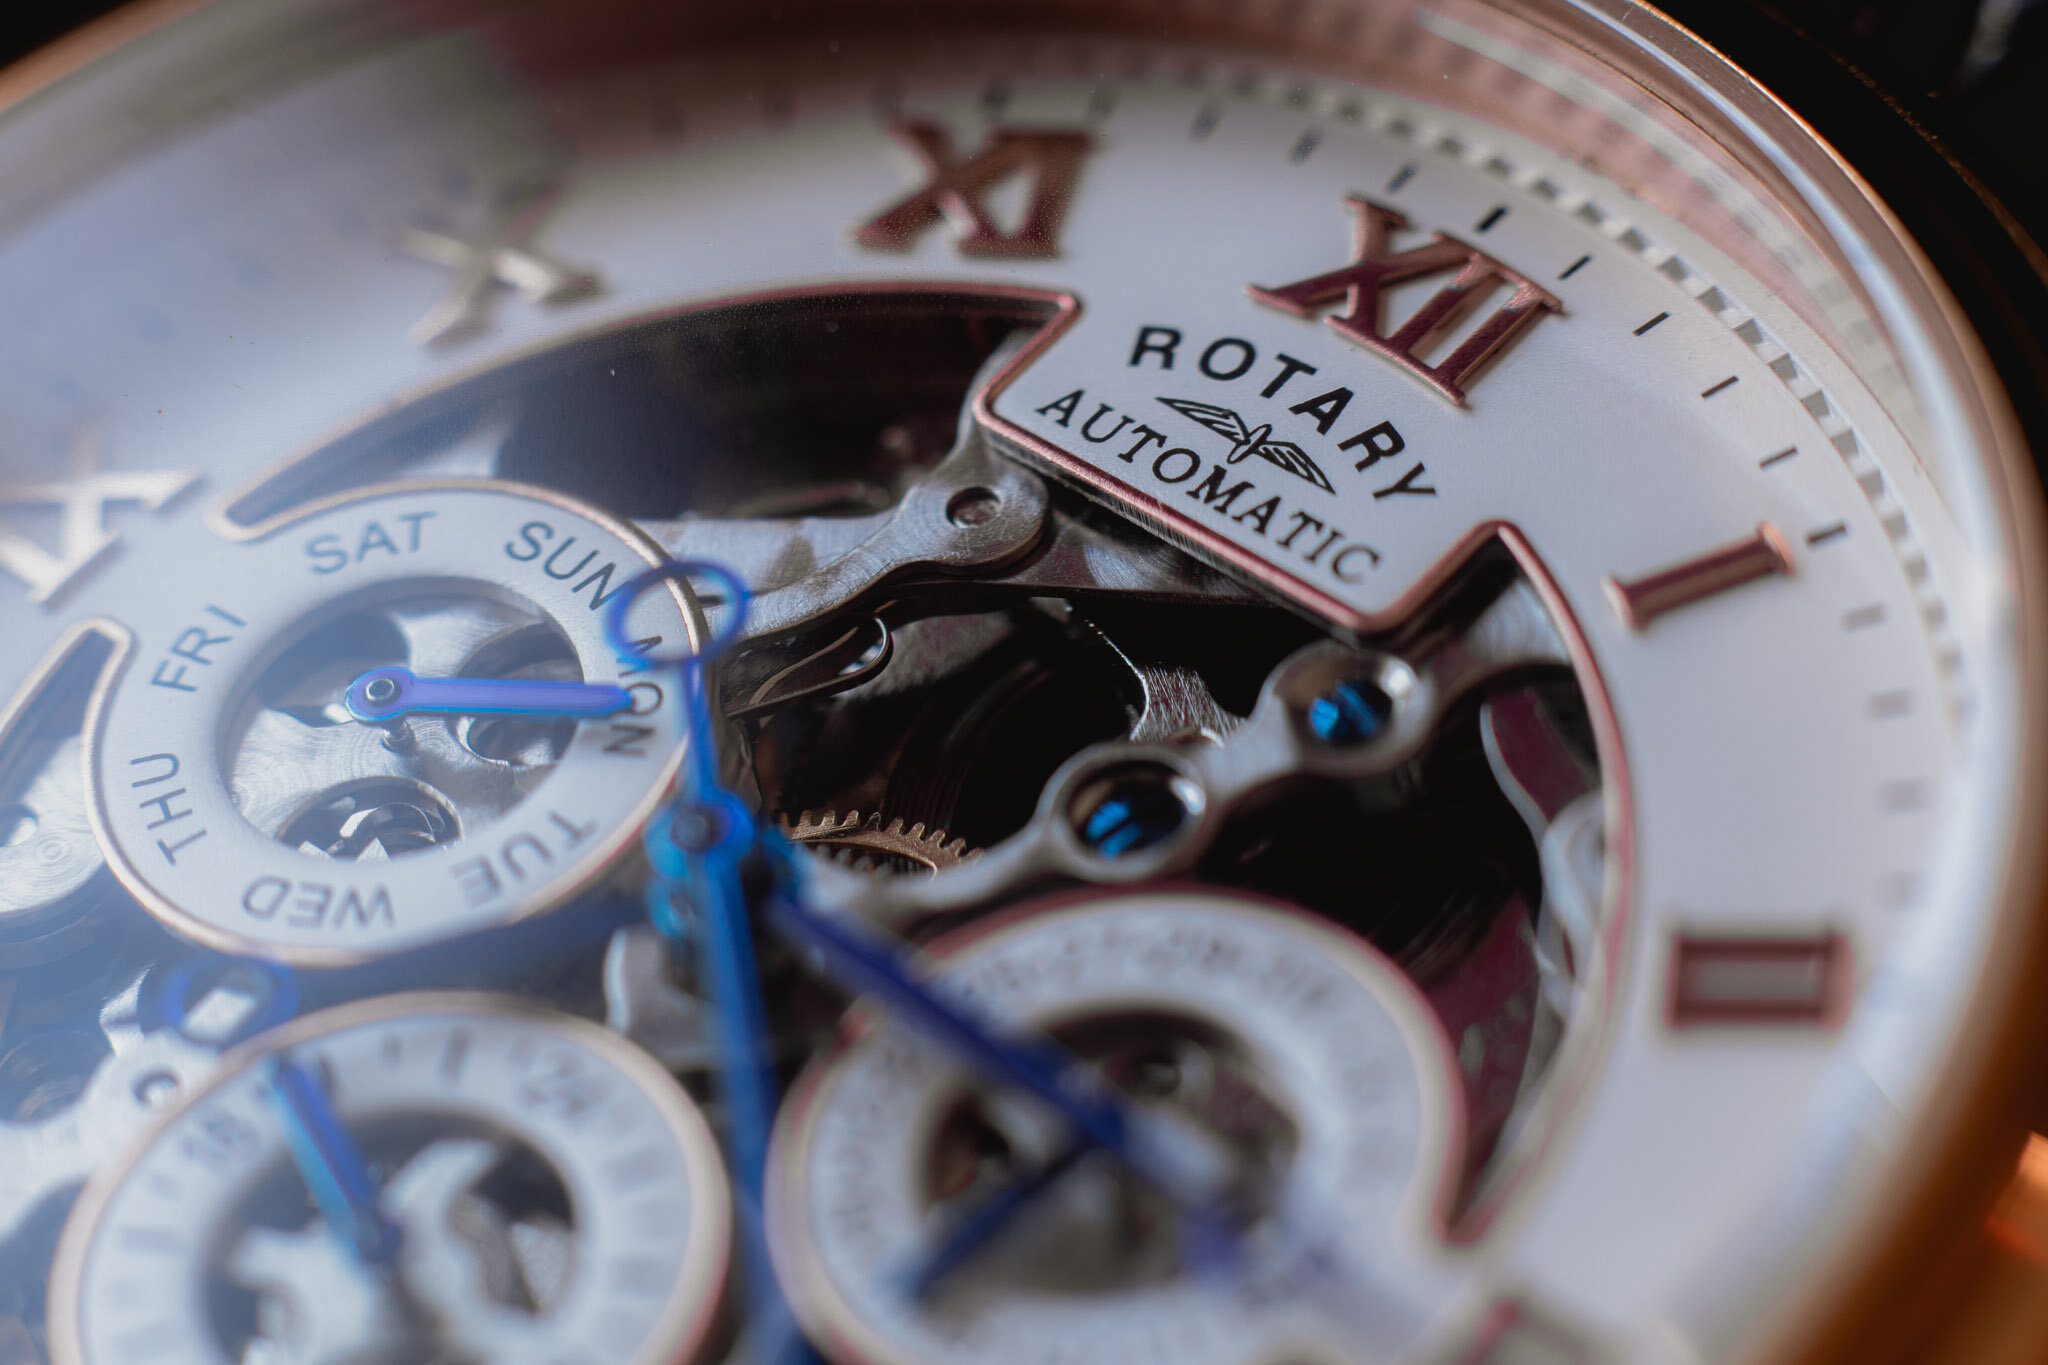
To show you the versatility of this inexpensive lens and also, the quality of photographs that you can take with it, I have showcased some different styles of photo that I’ve managed to create over the past years. You can really use this lens for anything that you can think of. One of my favourite things to photograph when this arrived in the post were flowers and plants in the garden. I’ve even managed to experiment with some macro photography using this lens. See how close I managed to get to the watch when I paired this lens with a product I’d like to introduce you to in the future.
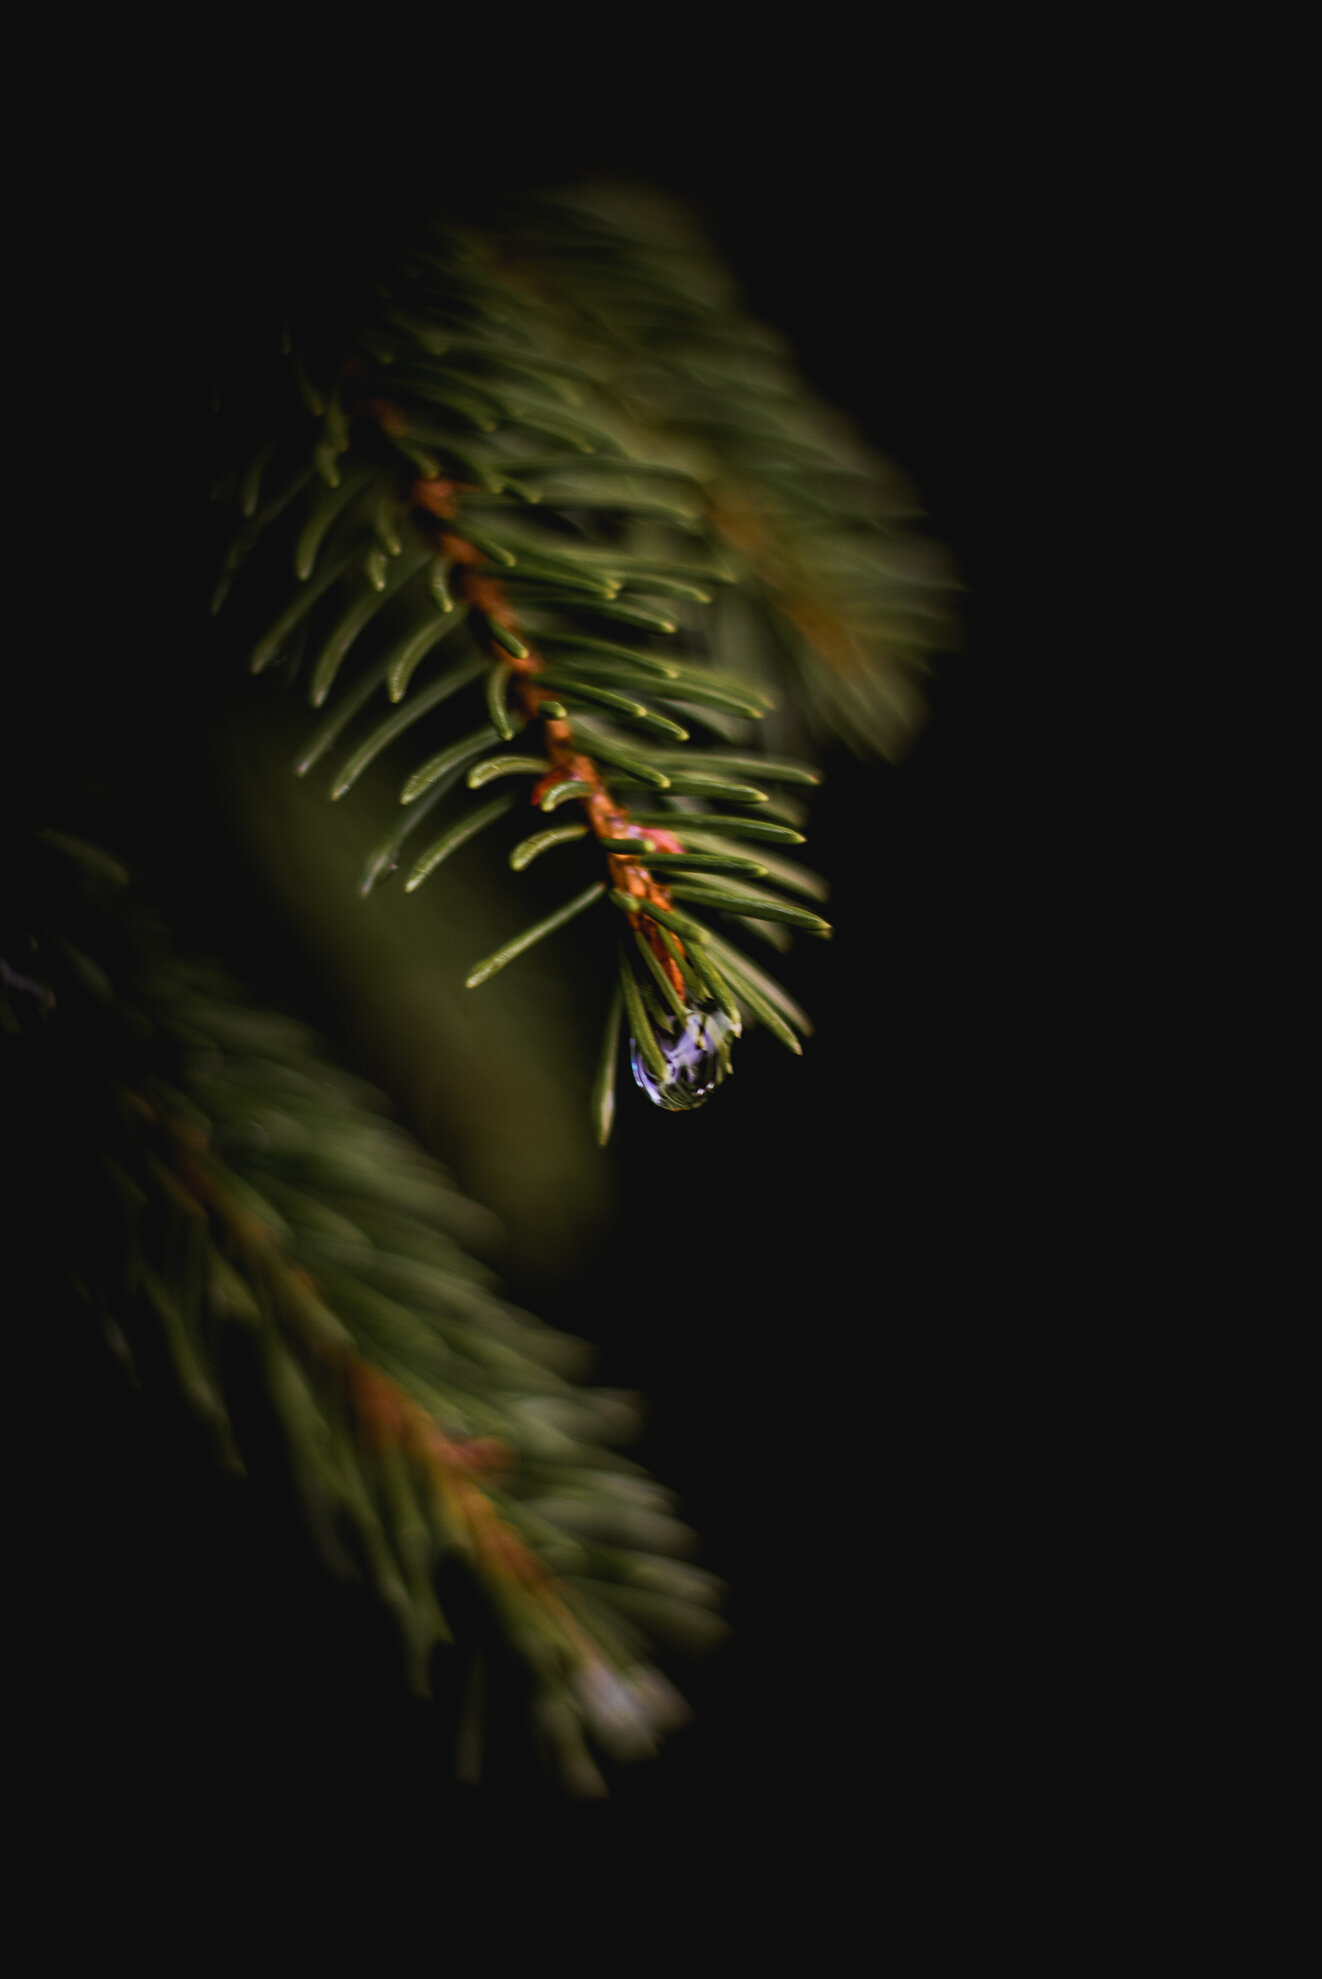
I really did all of my learning using this piece of glass, experimenting with different apertures and shutter speed. Study the photograph of my friend Joey in the red coat down below. See how the background looks out of focus and the main subject, Joey, is sharp and in focus? That was shot using an aperture of f/2.8 (from memory) therefore, giving the photograph that shallow depth of field that makes a portrait image look so pleasing to most people.


Canon 70-200mm f/4 II
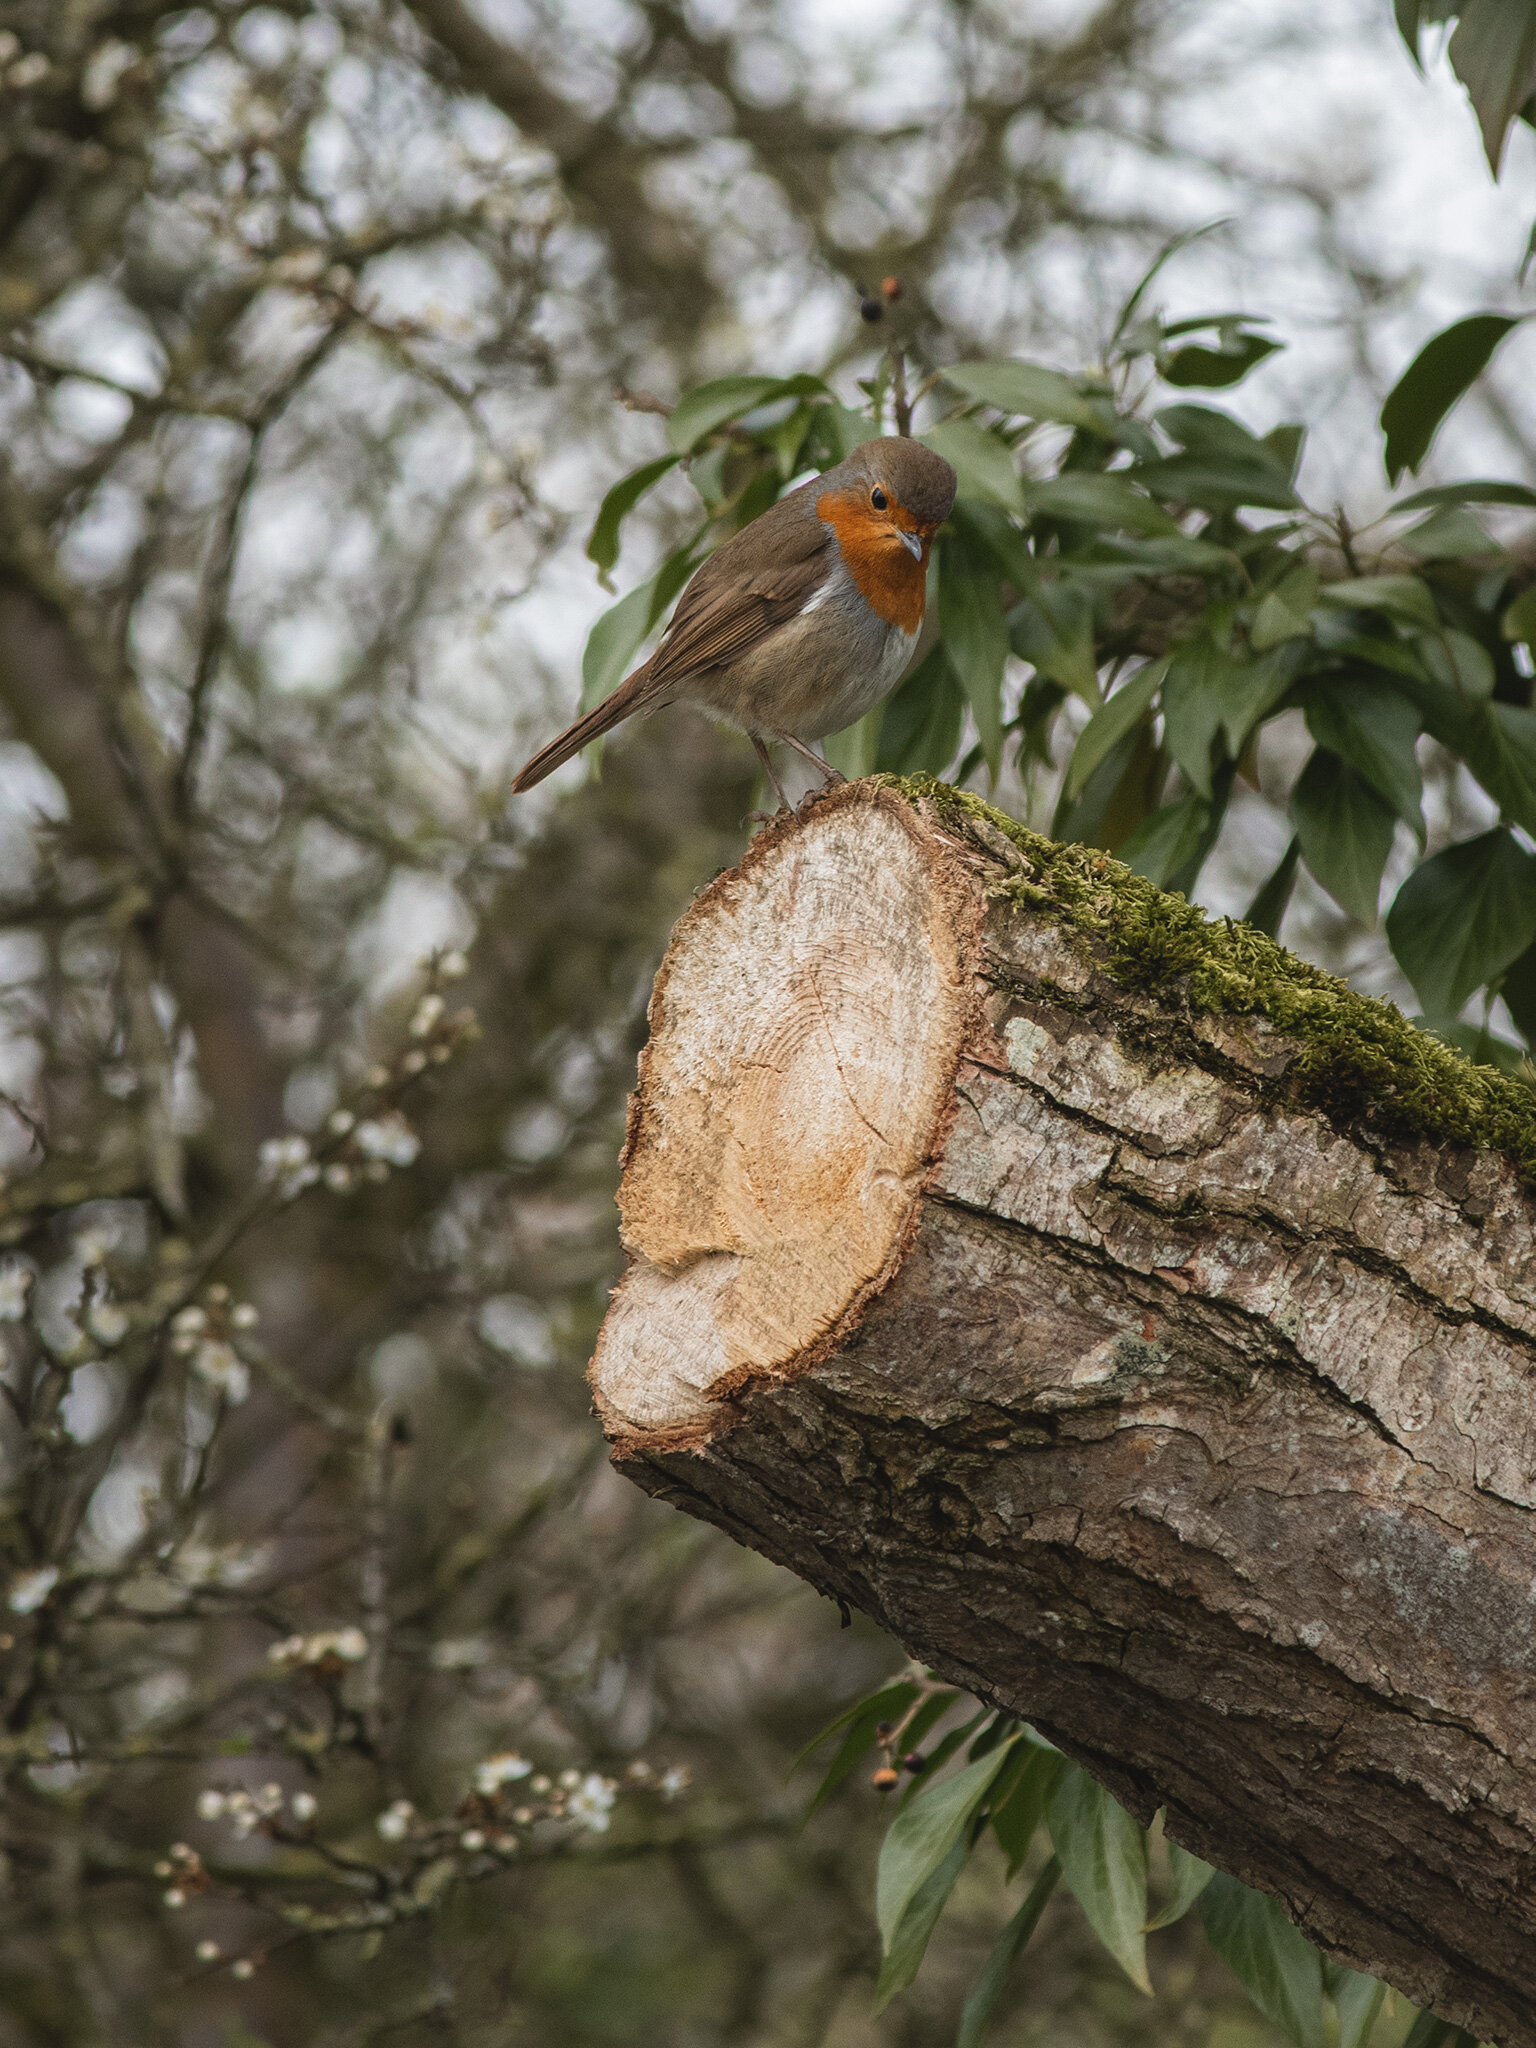
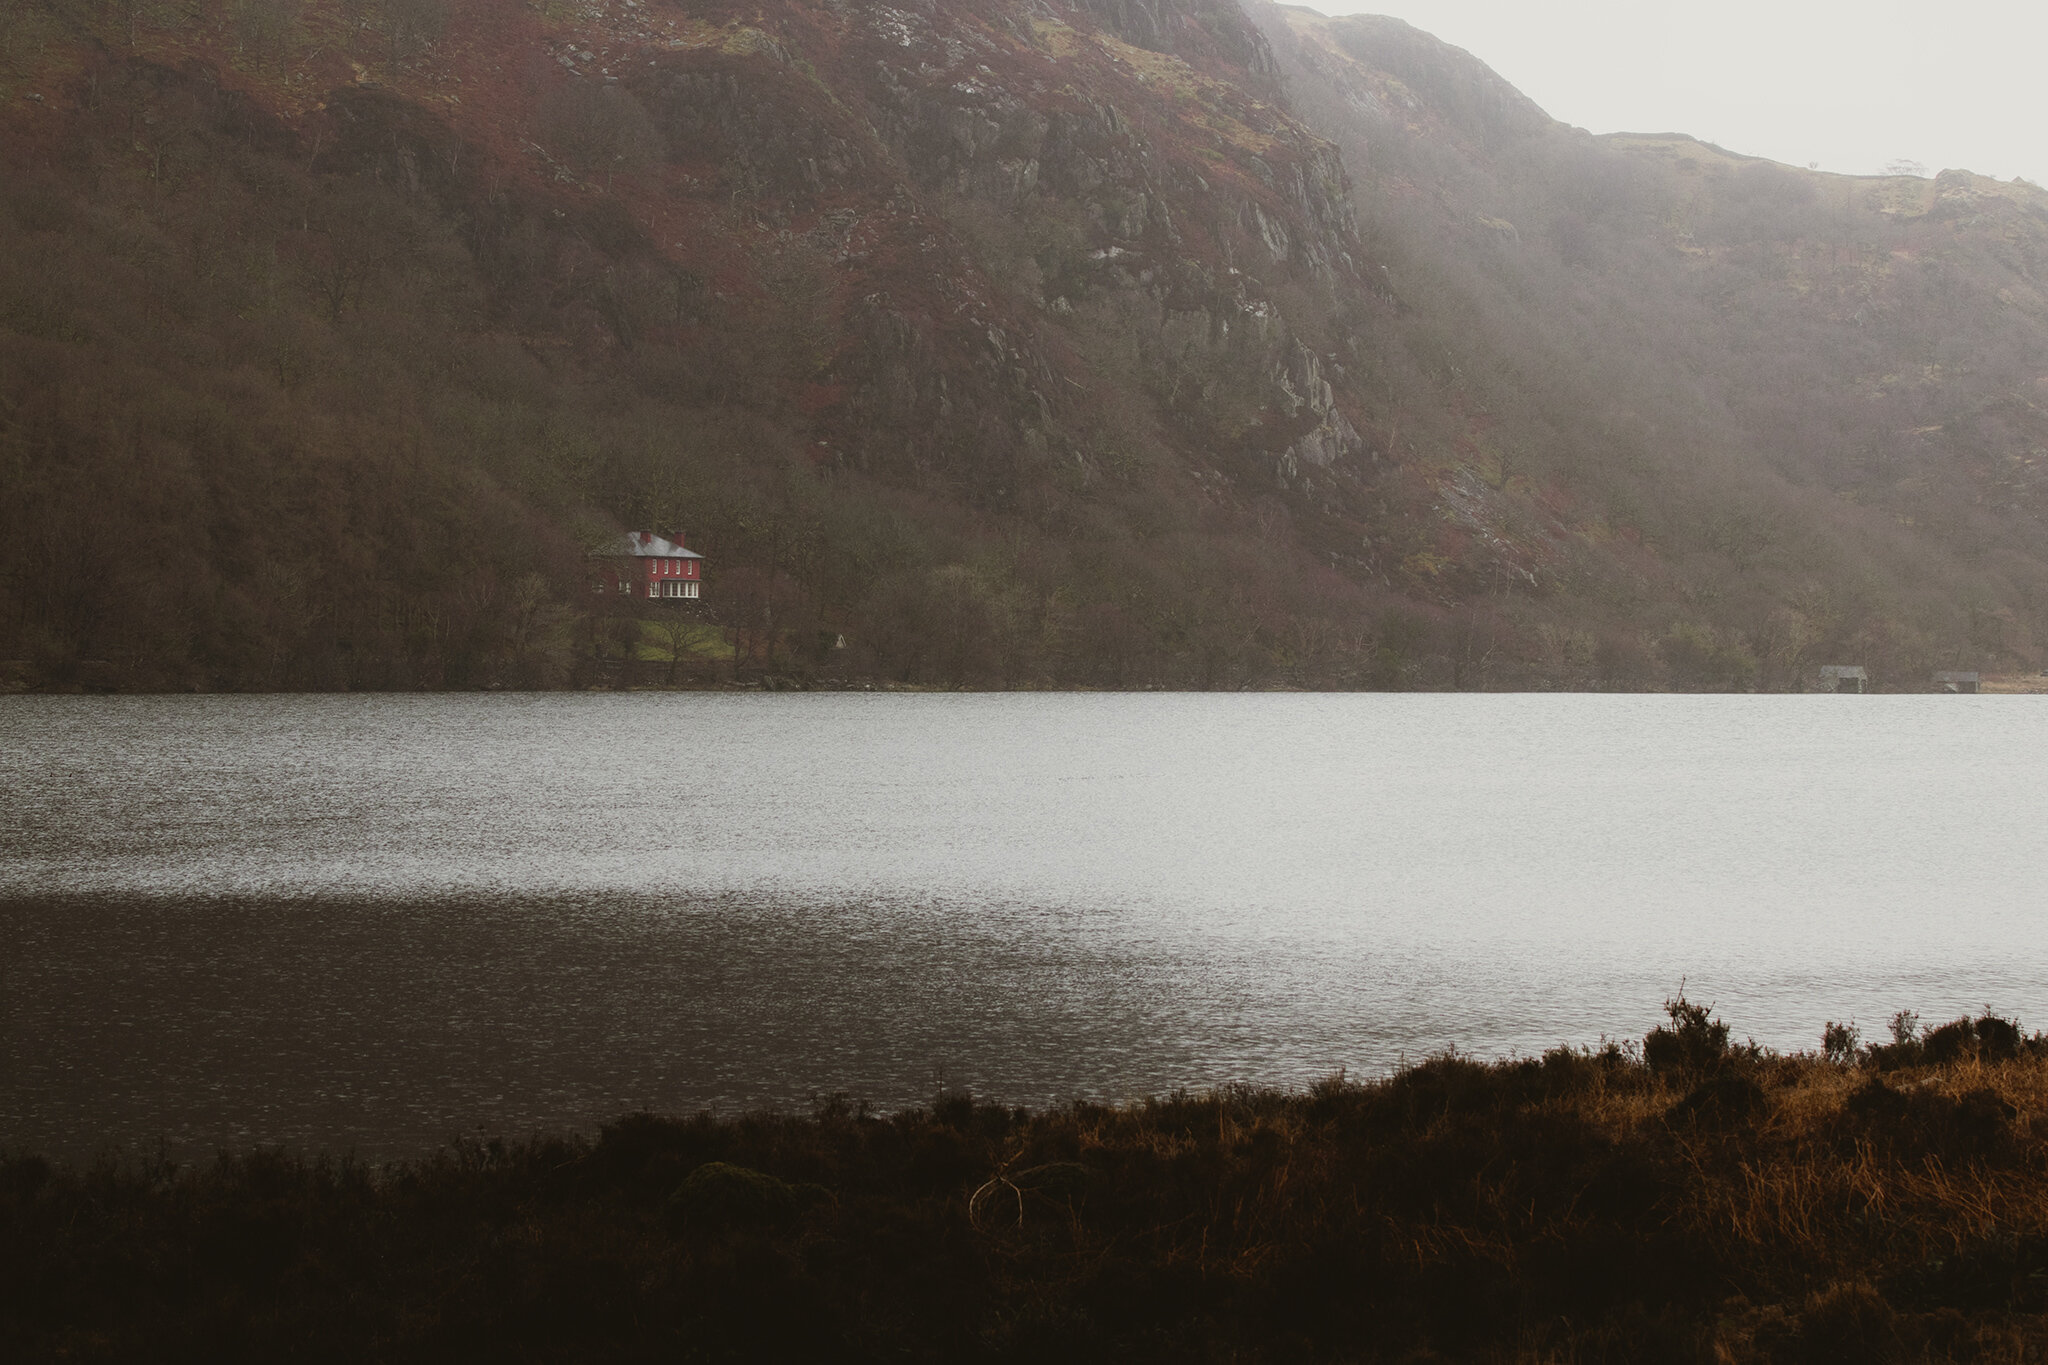
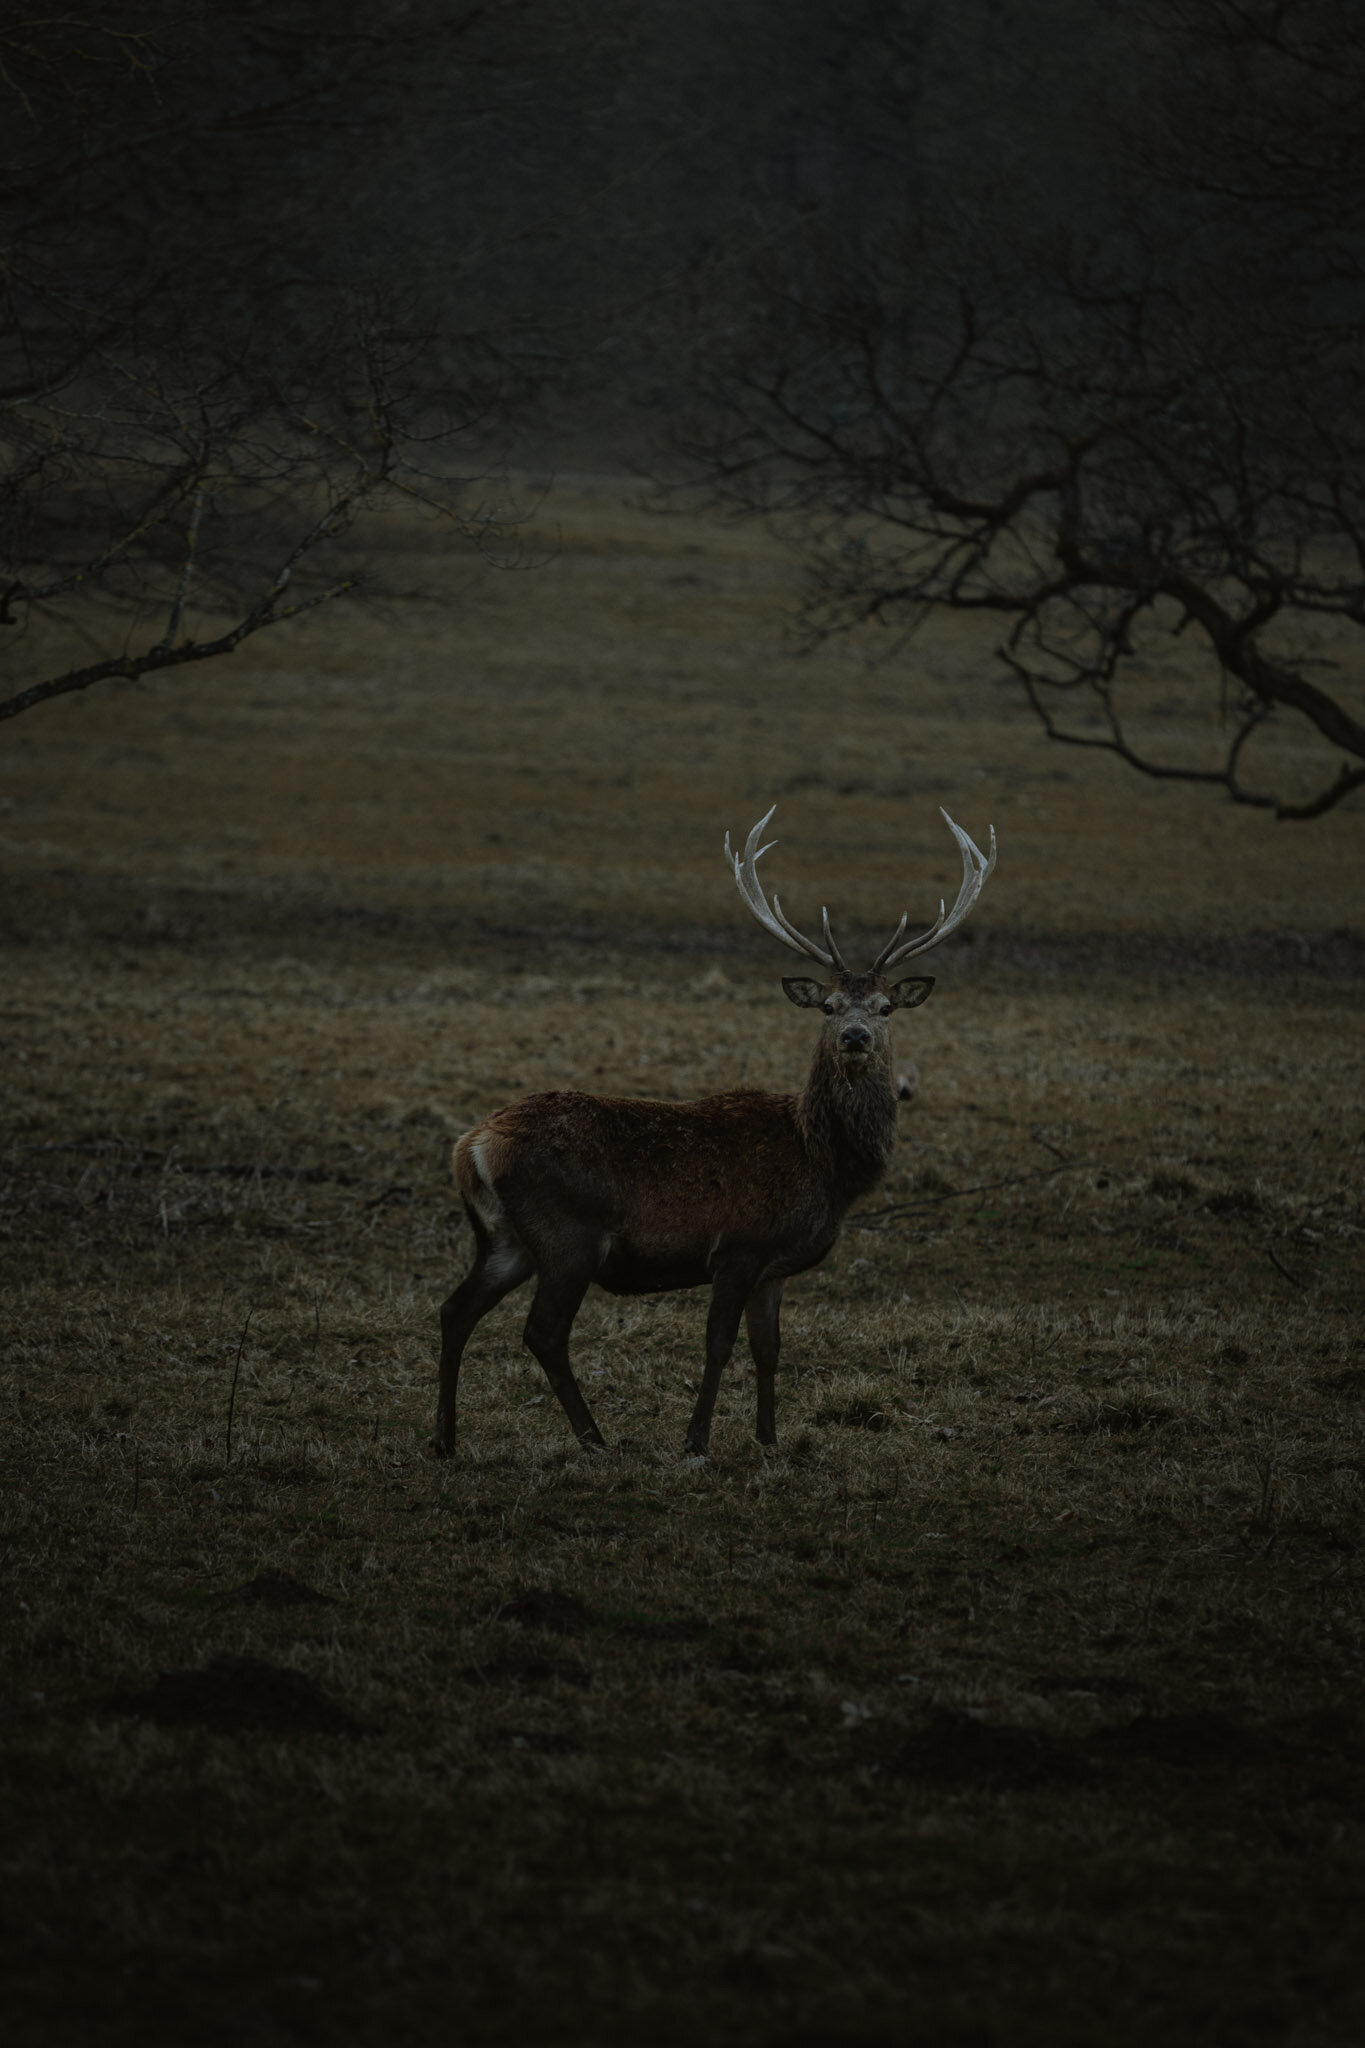
Finally, we have what I like to call the sniper, Canon’s 70-200mm f/4 II. Essential for my recent venture into the wildlife photography, this enables me to get right up in the animals personal space. I’ve managed to see right into the eye of a blackbird, get a close look of 8 swan eggs inside of Mothers’ nest and pick out isolated houses that draw my attention in the mountains of Snowdonia. A must-have in a photographers arsenal, this lens can be picked up from Wex Photo Video for around £1250 brand new or if you can hold out until they get a good quality used model, you can grab one for about £900.

Canon 70-200mm f/4 ii
A variety of images showcasing some of my work using the Canon 70-200mm lens.


The Filters
Gobe Neutral Density Filter Kit, Circular Polariser Filter, UV Filter

Gobe camera filters. My set up - UV filter, circular polariser (CPL) & neutral density (ND) filters.
Next up, lets talk about my choice of filters. I wanted to find something of good quality, that didn’t break the bank. After a while researching, reading articles and watching YouTube videos, I came across the Gobe filters. After watching the videos and understanding the product itself, I really became immersed in the story behind how the company started and also in their mission statement. I like that they are trying to make a difference in the world by planting trees when they sell a product. You can read all about the by following the link above.
I think that I spent just over £200 on the whole collection of filters. I’ll drop product links for each of the ones I use down below:
Gobe UV Filter - I use this on the front end of my 16-35mm lens as a protection mechanism when I haven’t got my CPL attached. Better to break the glass of a £30 filter than a £700 lens right?
Gobe CPL Filter - This definitely gets the most use out of all of my filters. Great for taking the sunny glare from surfaces such as water. It also seems to add some nice saturation and contrast levels to your photographs which definitely seems to give forest and woodland a denser, richer look. I don’t think that my colours would look the same in my photos without the circular polariser filter attached.
Here are some example images shot with the CPL filter.


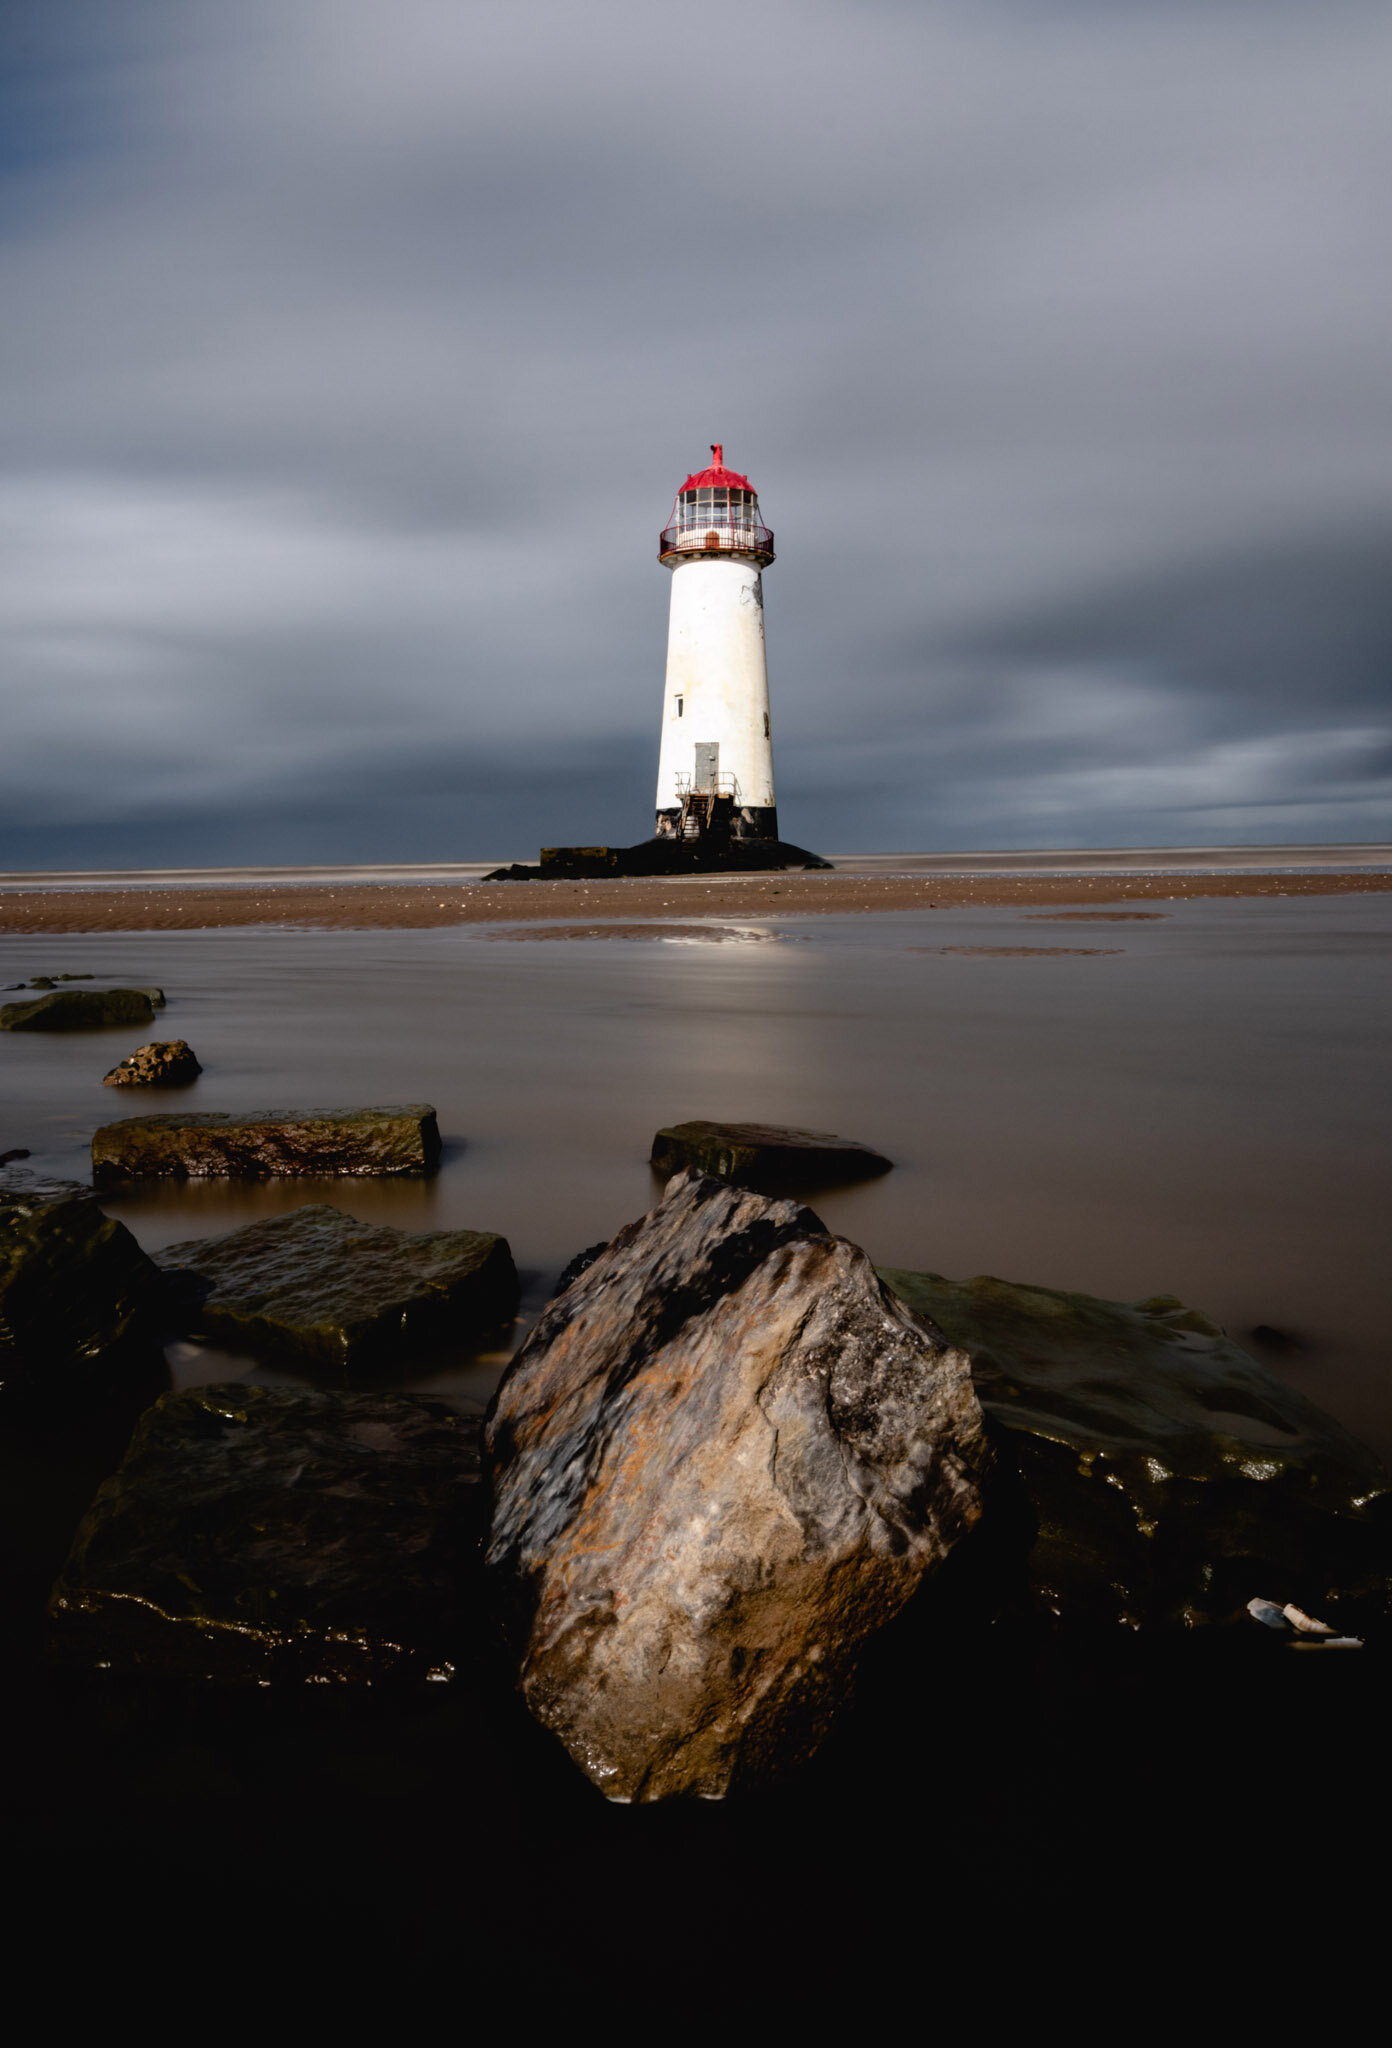
Gobe ND Filter Kit - While these filters don’t tend to get a great amount of usage, the photographs that I have managed to capture with them definitely stand out in my portfolio. These filters are basically a dark cover that goes over the front of the lens and acts as a pair of sunglasses, each one helping to block out a different amount of light. so a brighter scene could require a darker/ stronger filter, depending on the type of look you want in your photo. Great for use with things that move, like clouds, as it can give a sense of passing time in your picture (see the lighthouse picture below) - if you didn’t read the article that I linked explaining shutter speed, it might help you understand this in more detail. Read it here.
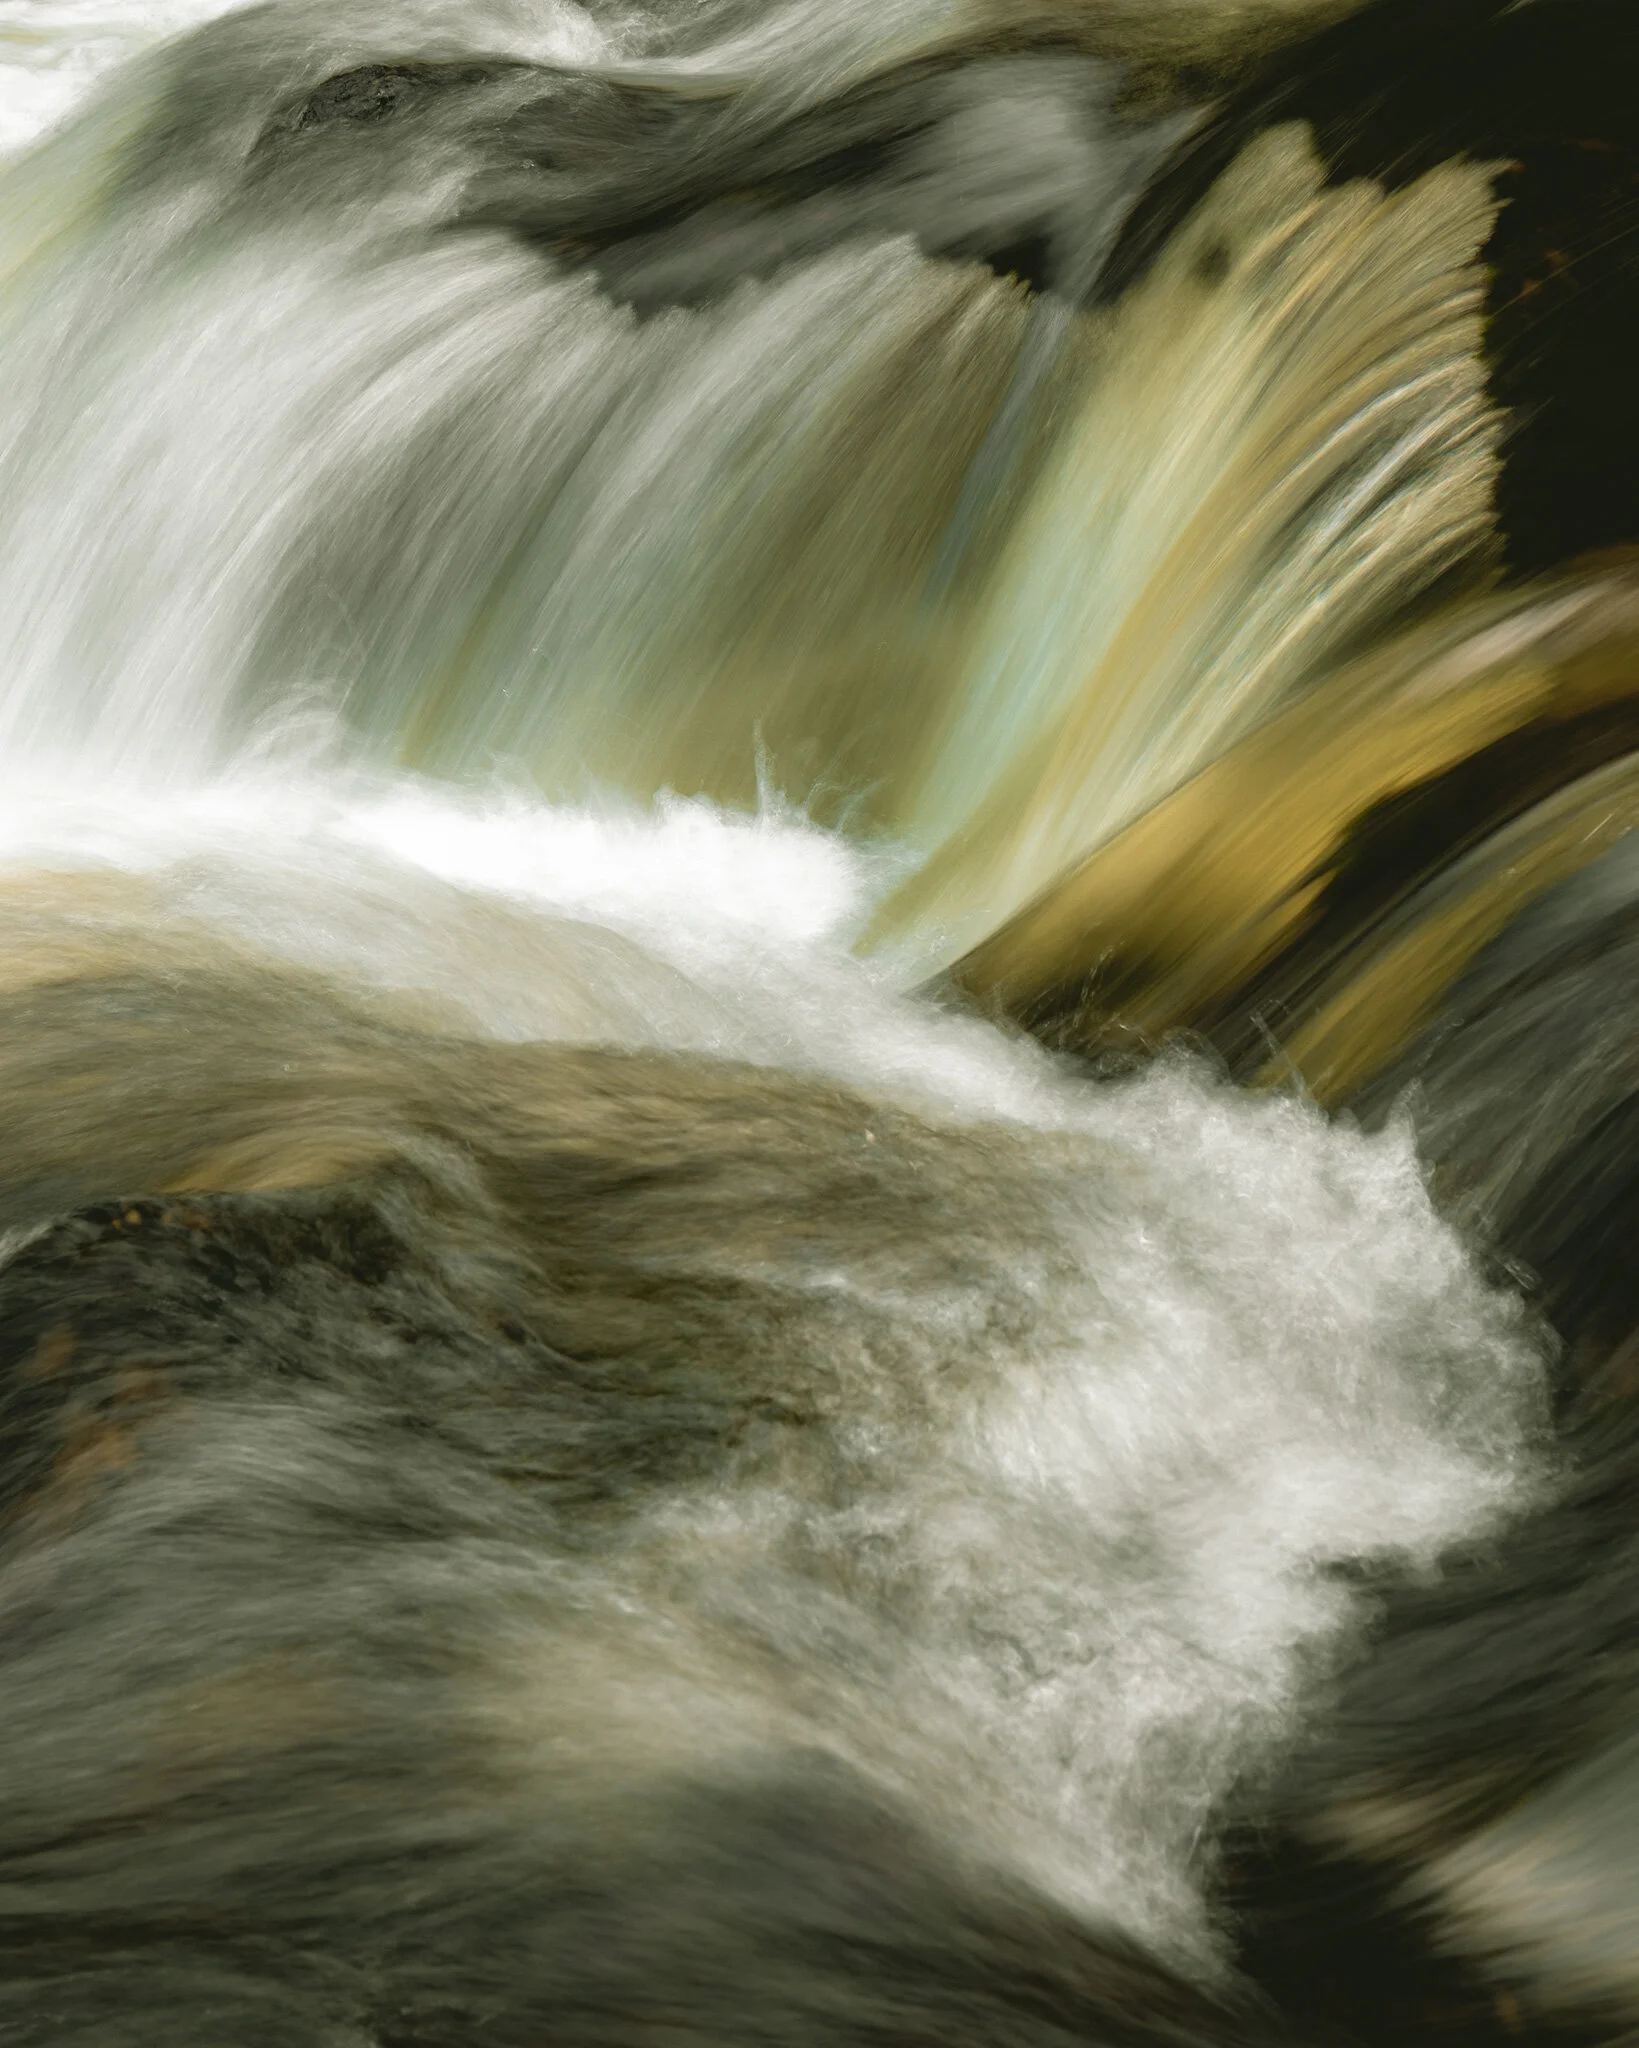
As well as clouds, the neutral density filters also do a great job with water, giving it a silky look in photographs. Click each of these to expand.

The Tripod
Manfrotto 190GO

Finally, I’ll take you onto the final piece of essential kit that is in my camera bag - the tripod. While the majority of my shots are taken with the camera handheld, there are times when I’d recommend using a good quality tripod. I find that a lot of my photographs are taken while I’m out hiking or on the move, so it just doesn’t make sense for me to keep getting my tripod set up but If I’m planning to head out solo, which I like to do very often these days, then I’m generally heading out with a certain photograph in mind and I can arrive on location to get set up, sometimes with hours spare. This is when I will make sure to use my tripod as, no matter how steady I claim my hand to be, or how fast a shutter speed I use, I always end up with a sharper photo.
Plus, in my opinion, nothing can beat the feeling of finding your spot, adjusting the legs, pitching the tripod, attaching your camera, realising you don’t like said spot, moving, re adjusting the legs because the new ground is uneven, adjusting the height because there’s now a branch in the way and then finally, just before you lose all of the sunset light, hearing that beautiful click of your shutter.
Conclusion
I hope you’ve all enjoyed reading! Thank you for making it this far, I do really appreciate your interest and support in my journey so far. It would be great if you manage to take something away from here that helps you to become a better photographer and please, if you have any questions regarding anything from this blog entry or just photography in general, then feel free to drop a comment down below or follow the links to my social platforms where you can private message me if you’d prefer to stay incognito.
Thanks.
Why not check out My Gallery for more photos? Or visit my project for Peak Fitness Performance next.